Inserting/creating the target in the snooperator
When a new product is created, a recognition image, the target, must first be uploaded.
Later, an individual detection zone can be defined in the snooperator. The recognition image is not cropped.
Certain features in the image are used for recognition. Features are high contrasts and sharp edges/corners. The more balanced the features are in the image, the better it can be recognized and tracked. Therefore, it makes sense to define the detection area with the area tool. In this way, areas without features can be removed.
The area tool can also be used to remove elements such as logos, visuals, etc. from the detection that appear on different products. This avoids double detections.
The snoopstar augmented reality service is constantly being developed and improved. This applies in particular to our image recognition technology.
Our detection service is able to detect and track objects by analyzing the contrast-based features of the object that are visible to the camera. You can improve an object’s performance by improving the visibility of these features by adjusting object design, rendering and scaling, and print output.
Object star rating
Image objects are recognized based on natural features that are extracted from the object (image to be recognized) and then compared with features in the live camera image during runtime. The star rating of an object is between 1 and 5 stars. Objects with a low rating (1 or 2 stars) can usually already be detected and tracked. For best results, however, you should select objects with 4 or 5 stars. To create traceable objects that are accurately detected, you should use images that have the following:
Rich in detail
Detailed street scene, group of people, collages and object mixes or sports scenes.
Good contrast
Has both bright and dark areas, is well lit and not dull in brightness or color.
No repetitive patterns
Lawn field, the front of a modern house with identical windows and other regular grids and patterns.
Lighting conditions
The lighting conditions in your test environment can significantly affect target recognition and tracking.
- Make sure that there is enough light in your room or in the vicinity of your activity to ensure that the scene details and object features are clearly visible in the camera view.
- Keep in mind that detection works best indoors, where lighting conditions are usually more stable and easier to control.
- If your use cases and scenarios require operation in dark environments, consider activating your device’s flashlight.
Object size
- For tabletops, product shelves, near-field and similar scenarios, a physical printed image should have a width of at least 12 cm and an appropriate height for a good AR experience.
- The recommended size varies depending on the actual object rating and distance to the physical image object.
- Consider increasing the size of the objects according to the distance to them.
- You can estimate the minimum size your object should have by dividing the distance from camera to object by ~10. For example, a 20 cm wide object would be recognizable up to a distance of about 2 meters (20 cm x 10). Note, however, that this is only a rough guide and that the actual working distance or size ratio may vary depending on lighting conditions, camera focus, and object size.
Printed object – flatness
The tracking quality can deteriorate significantly if the printed objects are not flat. When designing physical prints, game boards, game figures, make sure that the objects do not bend, roll up, crease or wrinkle. A simple trick is to use thick paper when printing, e.g. 200-220 g/m². A more elegant solution is to use a foam core on a 1/8″ or 3/16″ – 3 or 5 mm – thick plate.
Printed object – gloss
Printouts from modern laser printers can also be glossy. A glossy surface is no problem under ambient light conditions. But from certain angles, some light sources, such as a lamp, a window, or the sun, can produce a shiny reflection that covers large portions of the original texture of the print. Reflection can cause tracking and detection difficulties – similar to partially shielding the object.
Viewing angle
Object features are more difficult to see and tracking may be less stable if you view the object from a very steep angle or if your object appears very oblique in relation to the camera. When defining your usage scenarios, keep in mind that an object facing the camera, whose normal state is well adjusted to the camera orientation, has a better chance of being detected and tracked.
Properties of an Ideal Object
Objects with the following attributes provide the best detection and tracking performance.
Example of an attribute
Rich in detailed street scenes, groups of people, collages and object mixes or sports scenes.
Good contrast
Bright and dark areas and well lit areas.
No repetitive patterns
A grassy field, the facade of a modern house with identical windows and other regular grids and patterns.
Size
The format must be 8 or 24 bit, PNG and JPG; less than 2 MB in size; JPGs must be sRGB or grayscale (no CMYK).
Natural Characteristics and Image Ratings
The star rating defines how well an image can be recognized and tracked.
The rating can range from 0 to 5 for a specific image. The higher the rating of an image object, the stronger its detection and tracking capability. A rating of 0 means that an object is not tracked by the AR system at all, while a star rating of 5 means that an image can easily be tracked by the AR system.
Attributes
A characteristic is a sharp, tapered chiseled detail in the image, as is the case with structured objects, for example. The image analyzer recognizes these features. Increase the number of these details in your image and make sure that the details create a non-repeating pattern.

A square contains four characteristics for each of its corners.
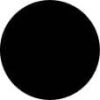
A circle does not contain any features because it does not contain any sharp or chiseled details.

This object contains only two features for each sharp corner.
Note: According to the definition of a characteristic, soft corners and organic edges are not marked as characteristics.
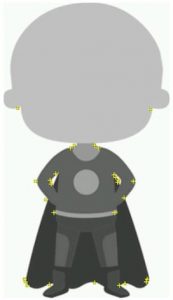
Image with a small number of characteristics

star rating
Not enough characteristics. More visual detail is required to increase the total number of features. Poor distribution of characteristics. Characteristics are present in some areas of this screen, but not in others. Characteristics must be evenly distributed throughout the screen. Poor local contrast. The objects in this image need sharper edges or clearly defined shapes to achieve better local contrast.
Image with high number of features
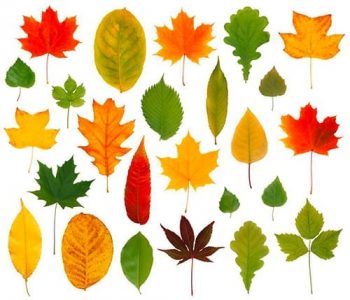
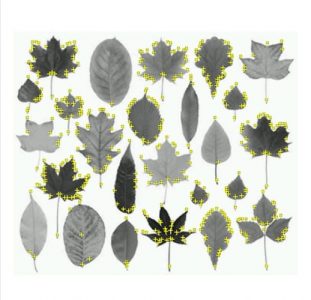
star rating
Original image
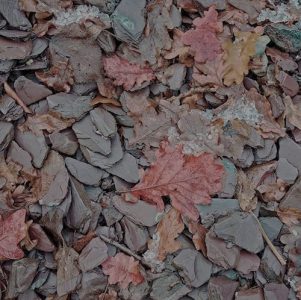

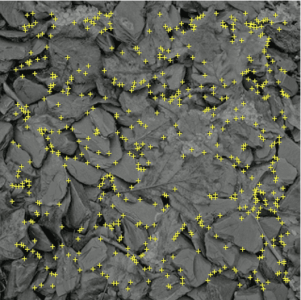
star rating
Improved local contrast
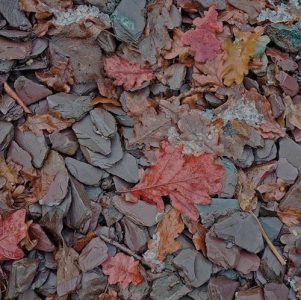

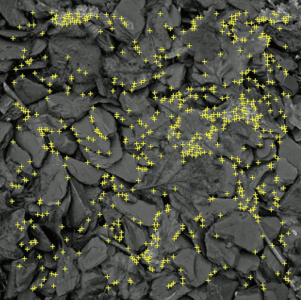
star rating
Strong improvement of local contrast
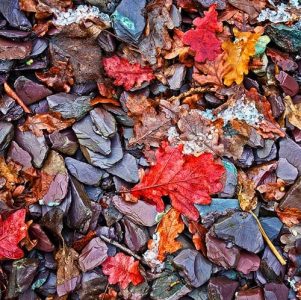


star rating
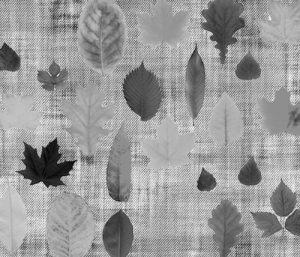
This artwork shows a more practical example of how to improve the local contrast of the object. We use a two layer image. In the foreground there are some multicolored sheets. The background is a textured surface. The layers exist only in our graphics editor; when uploading, we always use a flattened image, e.g. in PNG format. The uploaded image has a size of 512 x 512 pixels and is therefore slightly larger than the recommended minimum of 320 pixels.
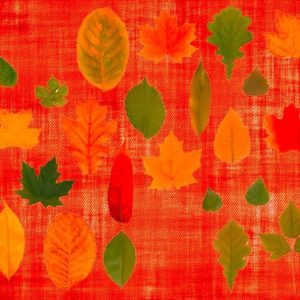
At first glance, the original image may have enough detail to function as an object. Unfortunately the upload leads to a very low rating of only one star. This indicates poor tracking performance. Continuous improvements can improve object quality to a five-star object, resulting in better detection and tracking performance.
1. variation
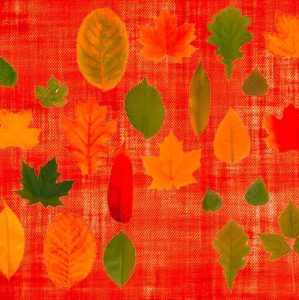
scope
Original image that is to be used as an object. This image results in poor quality because not many features with good contrast can be found.
star rating
2. variation
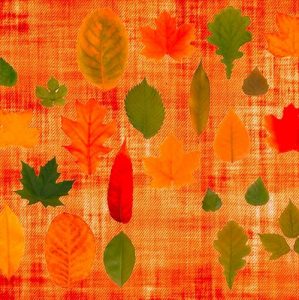
scope
If the background of variant 1 is changed to a background that is richer in contrast, in this case brighter, the evaluation improves because the image shows features that are richer in contrast. Nevertheless, the rating of 2 is unsatisfactory.
star rating
3. variation

scope
Let’s increase the contrast of the features in the foreground of variant 2. To do this, we have increased the contrast of the foreground area and also reduced its brightness. This gives us an average result and robustness.
star rating
4. variation

scope
We can further improve the features by applying local contrast enhancement to variant 3. Note that the printed object must be sharp to get the expected tracking result and the focus in the application must be set correctly at runtime.
star rating
5. variation
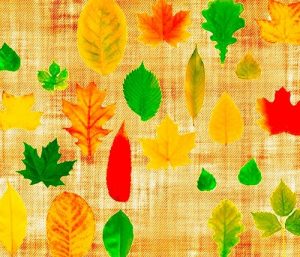
scope
Another way to increase the local contrast of variant 2 is to further increase the balance between foreground and background. Here we use a white background. This process is not always possible because it changes your original design. However, you can take this into account when creating or recommending an initial version.
star rating
6. variation
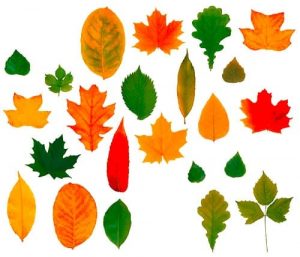
scope
To achieve a further improvement, we can combine effects. Here we took variant 3 with an already improved foreground and replaced the background with white. The overall contrast results in an excellent performance.
star rating
7. variation
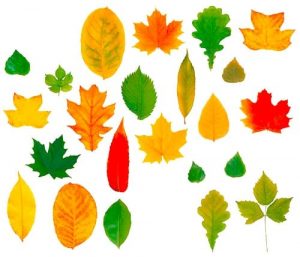
scope
Another combination is to use the image shown in variant 5 and apply local contrast enhancement as suggested in variant 4. The combined effect is also a five-star object.
star rating
Feature distribution
The more balanced the distribution of features in the image, the better the image can be recognized and tracked. Make sure the yellow crosses are well distributed throughout the image. Consider cropping the image to remove areas without features.
Image characteristics unevenly distributed across the target


star rating
Poor characteristic distribution. Characteristics exist in some areas of this screen, but not in others. Characteristics must be distributed evenly over the entire screen. Poor local contrast. The objects in this image need sharper edges or clearly defined shapes to achieve better local contrast.
Trimmed image, better feature distribution


star rating
Avoid organic forms
Typically, organic shapes with soft or round details that contain blurry or highly compressed aspects do not provide enough detail to be recognized and tracked correctly or not at all. They suffer from a small number of features.
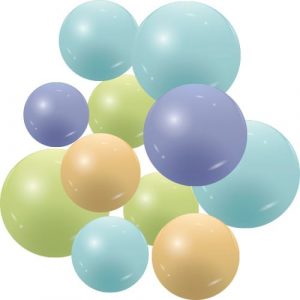
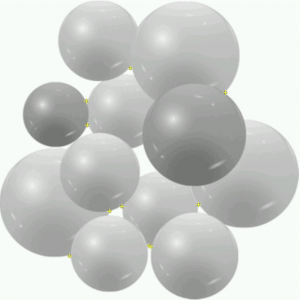
star rating
There are no features in this image as there are no visual elements with sharp edges and high contrast. The AR camera does not detect or track images with these or similar characteristics.
Avoid repetitive patterns
Although some images contain enough features and good contrast, repetitive patterns hamper recognition performance. For best results, choose an image without repeating subjects (even if they are rotated and scaled) or a strong rotational symmetry. A chessboard is an example of a repeating pattern that cannot be recognized because the 2 x 2 pairs of black and white fields look exactly the same and cannot be distinguished by the detector.
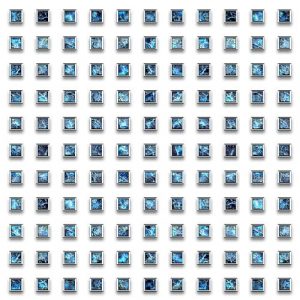
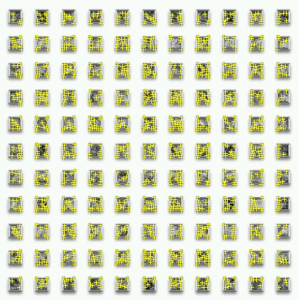
star rating
This image is not suitable for detection and tracking. You should consider an alternative image or modify it significantly.
Although this image has enough features and good contrast, repetitive patterns hinder recognition performance. For best results, choose an image without repeating subjects (even if they are rotated and scaled) or a strong rotational symmetry.
How to evaluate an object in grayscale
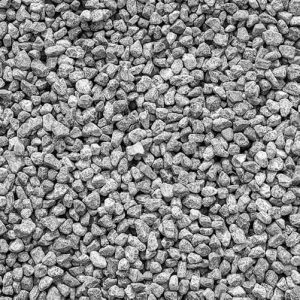
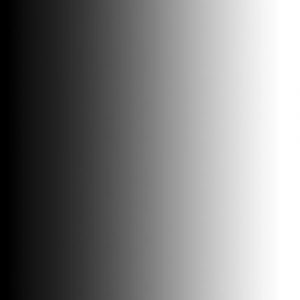
Our recognition software uses the grayscale version of your image to identify features that can be used for recognition and tracking. You can use the grayscale histogram of your image to evaluate its suitability as an object. Grayscale histograms can be created with an image editing application such as GIMP or Photoshop.
If the image has a low overall contrast and the histogram of the image is narrow and pointed, it is probably not a good object. These factors indicate that the image does not have many useful features. However, if the histogram is wide and flat, this is a first indication that the image contains a good distribution of useful features. Note, however, that this is not true in all cases, as the image in the last row of this table shows.
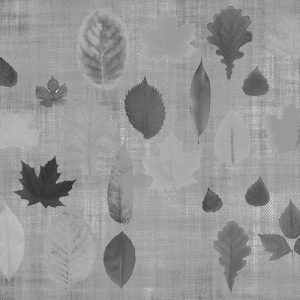

star rating

star rating

star rating

star rating
To use the feature exclusion buffer
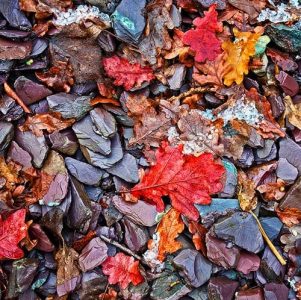
A feature exclusion buffer outlines the use of an uploaded image. This buffer area is about 8 % wide and does not include any characteristics, even if there are characteristics within this zone. The first row of the following table shows that the red shaded area does not contain any characteristics, although visible characteristics exist in this zone.
Original image
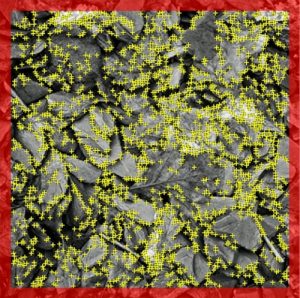
Picture with frame
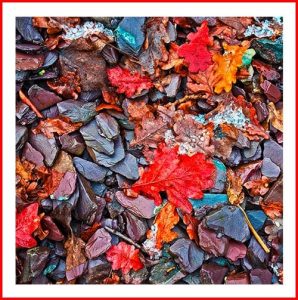
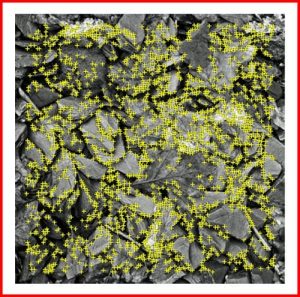
You can avoid this situation of feature exclusion by adding a white 8% buffer around the image as shown in the bottom row of the table above. But keep in mind that these characteristics will only be helpful if it can be guaranteed that the object is on a surface with its own color during runtime execution and does not have any characteristics itself.
To create non-rectangular image objects
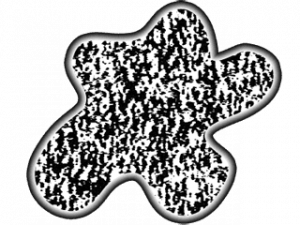
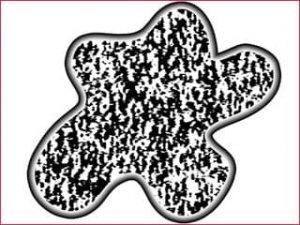
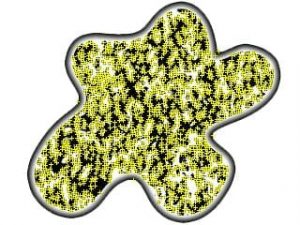
You can use non-rectangular 2D shapes as objects by placing the shape of an image motif on a white background. This ensures that only the characteristics of the shape are used for the image.
steps:
- Position the shape on a white background in an image editing application.
- Render the composite image as a JPG or PNG image file.
- Upload this file in snooperator to create a new object.
Cutout Design
Uploaded image
Analyzed image
How to optimize the physical properties of objects
Use the following recommendations to get the best performance from physical target images: Image objects should be rigid, not flexible, matt, not glossy. Small objects are good for editing by the user. Be creative in selecting objects so that they are useful, pertinent and playful.
A hard material such as cardboard, plastic or paper attached to an inflexible surface is better than a simple printed sheet of paper. The reason for this is that the flexibility of the printed paper can make it difficult to keep the object in focus. However, paper objects are easily reproducible and widespread, so you should not completely disregard them as valid targets.
Note that even if you give detailed instructions for the print format and paper quality, most users will revert to the standard of their printer, which is usually set to A4 or US Letter. To avoid these printing problems, it makes sense to store settings for books, promotional materials, packaging or posters.
Technical optimization
Target
- max. 1.000 px wide (height results)
- as little white space as possible
- Resolution: 72 dpi
- sRGB mode
- screen profiled
- File size max. 2 MB
- jpg, pdf or png
- Avoid reflections in the photo (even illumination)
- high-contrast display
- straight adjustment
Buttons
- Resolution, color space and color profiling like targets
- png format (for transparencies)
- High contrast display (button to background, font to button)
- Working with shadow, glow or outline
- Do not place buttons too far from the experience/target
- Pay attention to font size (legibility)
- Avoid overlapping of buttons
Content
- Only one content per target (double detection)
- Pay attention to character set and special characters. Optimize with TinyURL.com if necessary
Videos
- mp4 format, gifs
- Max. 800 px width
- Optimize file size (mp4 not more than 8 MB, gifs max. 2 MB)
- Generate thumbnail from video for still image
- Avoid overlapping with Image buttons (if necessary, use the z-axis option to separate the elements deep enough)
Optimization of continuous text targets

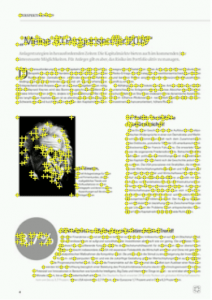
star rating
Although the target has many recognition points and also a 4-star rating, continuous text pages cannot lead to optimal results. The result may be that the loaded content trembles after recognition.

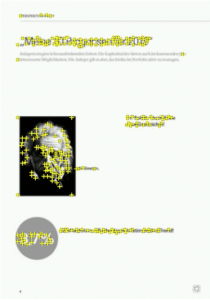
star rating
If the flow texts are removed from the same target, the star rating increases again, although fewer recognition points exist. The trembling is also eliminated by the way.
Use of animated GIFs
When using animated GIFs on the Experience, please note the following.
Animated GiFs can lead to memory problems on the mobile devices when it comes to displaying them on the experience. Even supposedly small files can put a heavy load on the memory of the devices.
Example
A GIF consists of 300 frames with a resolution of 600 px x 400 px and has a file size of 250 KB. By e.g. large transparent areas a GIF can be compressed well even with many frames, so that such a small file size can be achieved.
To display the GIF, all frames must be unpacked and converted into textures. This leads to the fact that the single frames can no longer be kept compressed in memory, but uncompressed in each case. The 8-bit color coding (256 colors from a table) must be converted into RGBA (24-bit).
The new memory size then pays off:
600 pixels * 400 pixels * 4 bytes (24-bit color depth) * 300 (frames) = 288,000,000 bytes
This corresponds to an uncompressed file size of about 275 MB.
Optimization of animated GIFs
When creating GIFs, it is therefore important to reduce the resolution and number of frames to a minimum.
Halve of the resolution of the above mentioned GIF to 300 px x 200 px results in a file size divided by four:
300 pixels * 200 pixels * 4 bytes (24 bit colour depth) * 300 (frames) = 72,000,000 bytes (approx. 69 MB)
If it is still possible to halve the number of frames, the uncompressed file is only about 35 MB in size.
